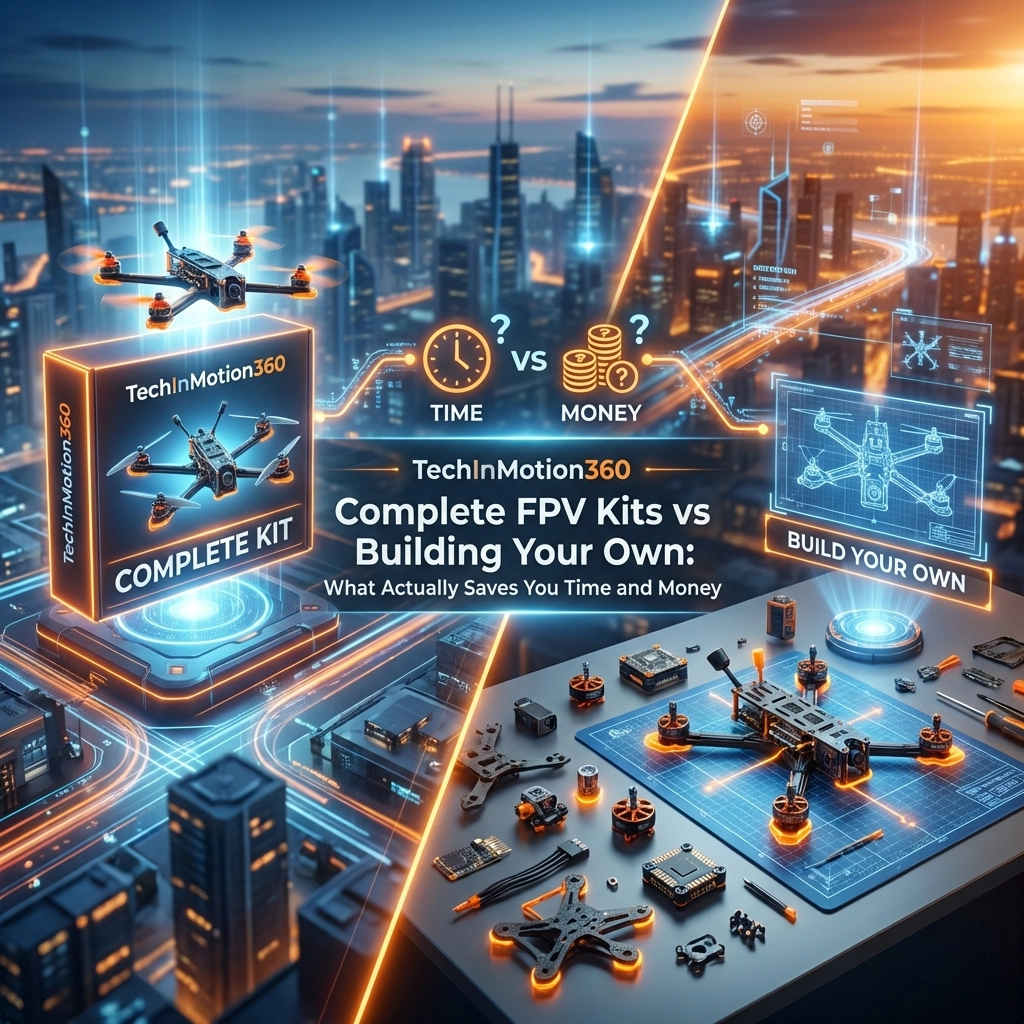
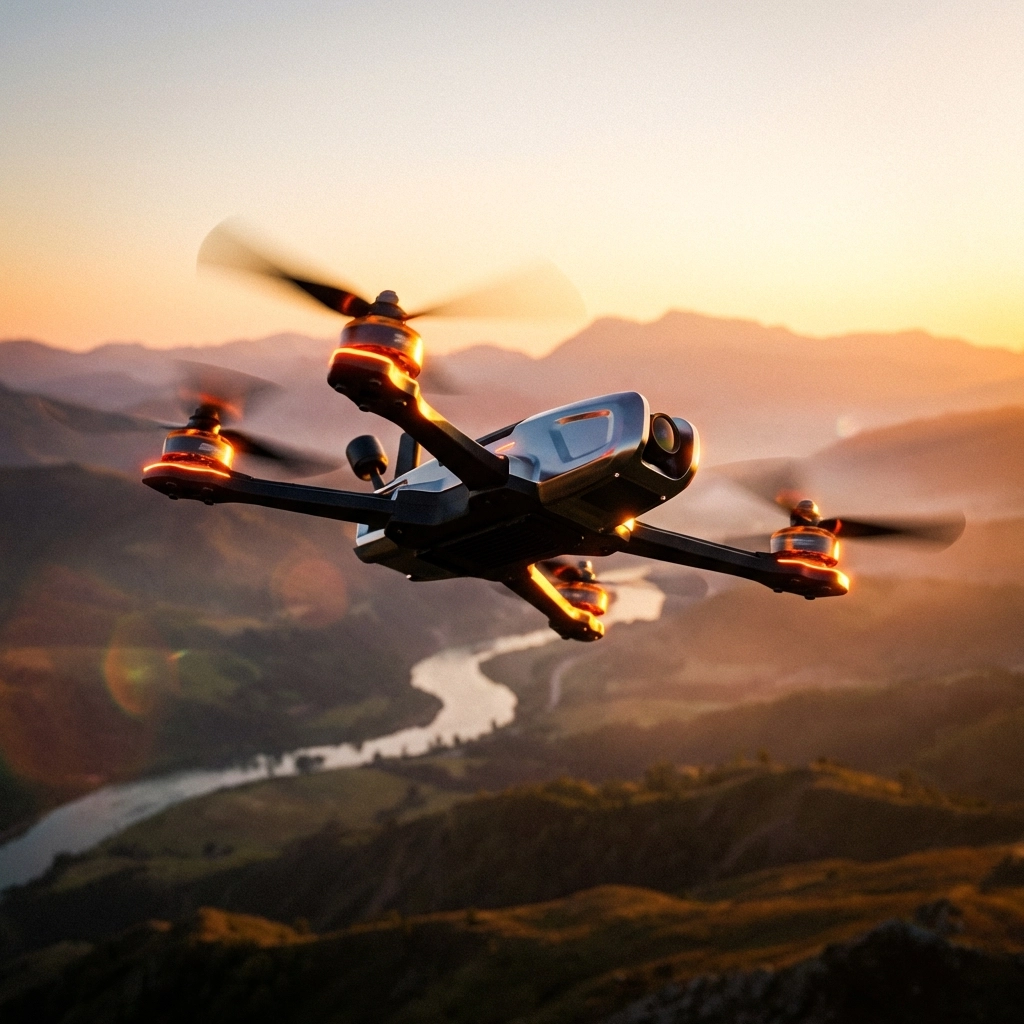
Best FPV Batteries for Long Flight Time: TechInMotion360's Top Picks vs Generic LiPo Packs

Let’s be real for a second, your FPV drone is only as good as the battery strapped to it. You could have the most dialed-in tune, the crispest camera setup, and motors that sing like angels, but if your battery is trash? You’re coming down early, watching voltage sag ruin your footage, or worse, dealing with a puffed pack that’s become a safety hazard.

I’ve seen too many pilots cheap out on batteries and pay for it later. Sometimes literally, when they have to replace damaged electronics. Sometimes figuratively, when they miss the shot because their pack couldn’t hold up under load.

So today, we’re breaking down what separates quality LiPo batteries from the generic packs flooding the market, and why the difference matters more than you might think.

Why Your Battery Choice Actually Matters

Here’s the thing about FPV batteries that nobody tells you when you’re starting out: they’re not all created equal. Two batteries with identical specs on paper can perform wildly differently in the air.

A quality battery delivers consistent power throughout your flight. It handles the amp demands when you punch out of a dive. It charges safely and maintains capacity over hundreds of cycles. A generic pack? It might do all those things… for a while. Then the voltage sag creeps in, the capacity drops, and suddenly that “1500mAh” battery is giving you 1100mAh on a good day.

image_1

The real cost of cheap batteries isn’t just the replacement cycle, it’s the performance you’re leaving on the table every single flight.

Understanding LiPo Battery Basics

Before we dive into comparisons, let’s make sure we’re speaking the same language.

Capacity (mAh): This is how much energy your battery can store. Racing and freestyle pilots typically run 1300-1500mAh packs for the power-to-weight balance. Cinematic flying? You’ll want 1800mAh or higher to maximize flight duration without sacrificing too much agility.

Discharge Rate (C Rating): This tells you how quickly the battery can deliver power. A 100C battery can theoretically discharge 100 times its capacity per hour. For most FPV applications, you want at least 75C for freestyle and 100C+ for racing.

Cell Count (S): Most modern FPV drones run 4S or 6S configurations. Higher voltage means more power potential, but also more weight and complexity.

Internal Resistance (IR): Lower is better. This measures how efficiently the battery can deliver power. High IR means wasted energy as heat and increased voltage sag.

TechInMotion360’s Top Picks: What We Recommend

Through years of testing and real-world flying, we’ve identified the battery characteristics that actually matter for different flying styles. When clients come to us for power system upgrades, battery selection is always part of the conversation.

For Long-Range and Cinematic Work

If you’re chasing extended flight times, think long-range cruising or cinematic real estate shots, the battery game changes completely. Li-Ion cells like the Molicel P30B have become the gold standard here. They offer superior energy density, meaning more flight time per gram of weight.

For 10-inch long-range builds, we typically recommend 6S configurations in the 8000-10000mAh range with 25-30C discharge rates. These aren’t going to win any races, but they’ll keep you in the air for 20+ minutes of smooth, controlled flight.

image_2

For Freestyle and Racing

This is where high-quality LiPo packs shine. You need batteries that can dump serious amps without flinching, and recover quickly when you let off the throttle. Look for:

  • True 100C+ discharge capability (not just marketing numbers)
  • Low internal resistance across all cells
  • Balanced cell voltages out of the box
  • Quality XT60 connectors with solid solder joints

The Molicel P28A and Sony VTC6 cells are excellent choices for builds where you need both punch and reasonable flight times.

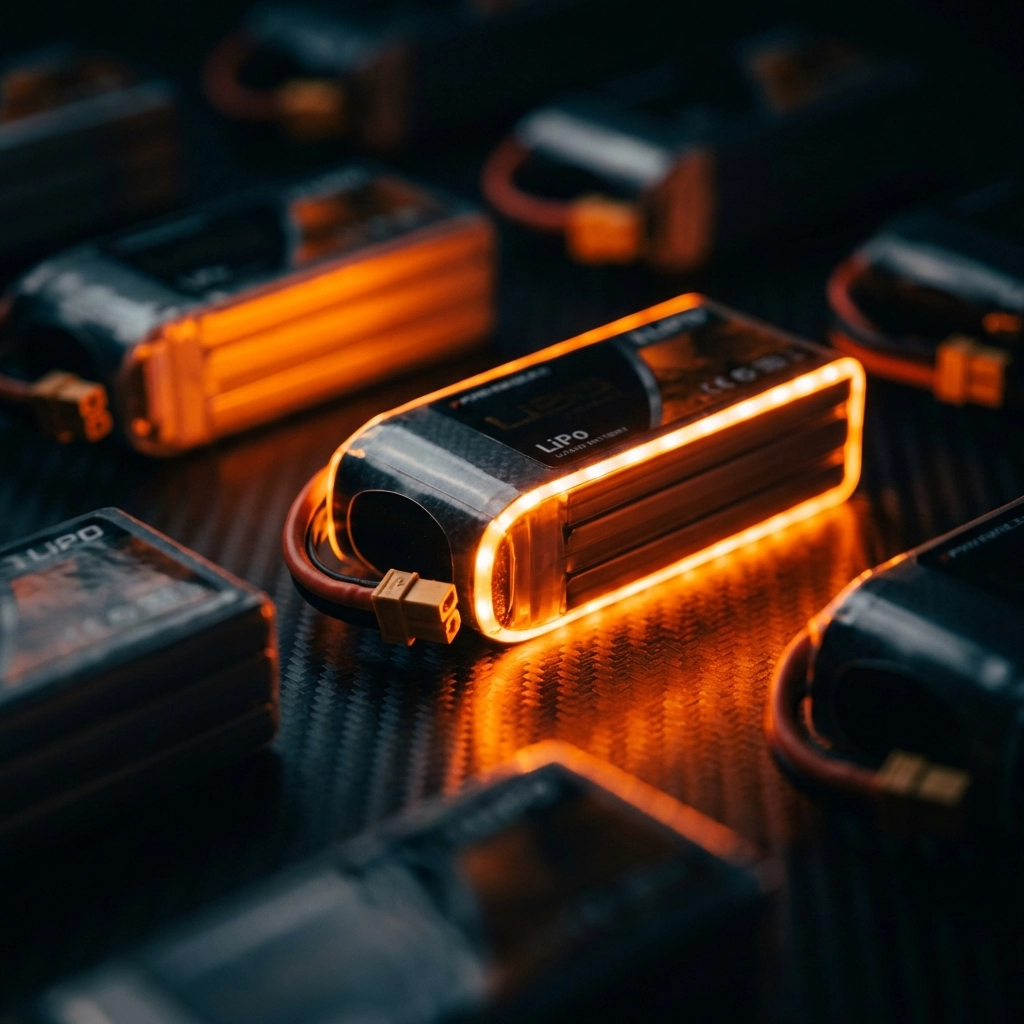
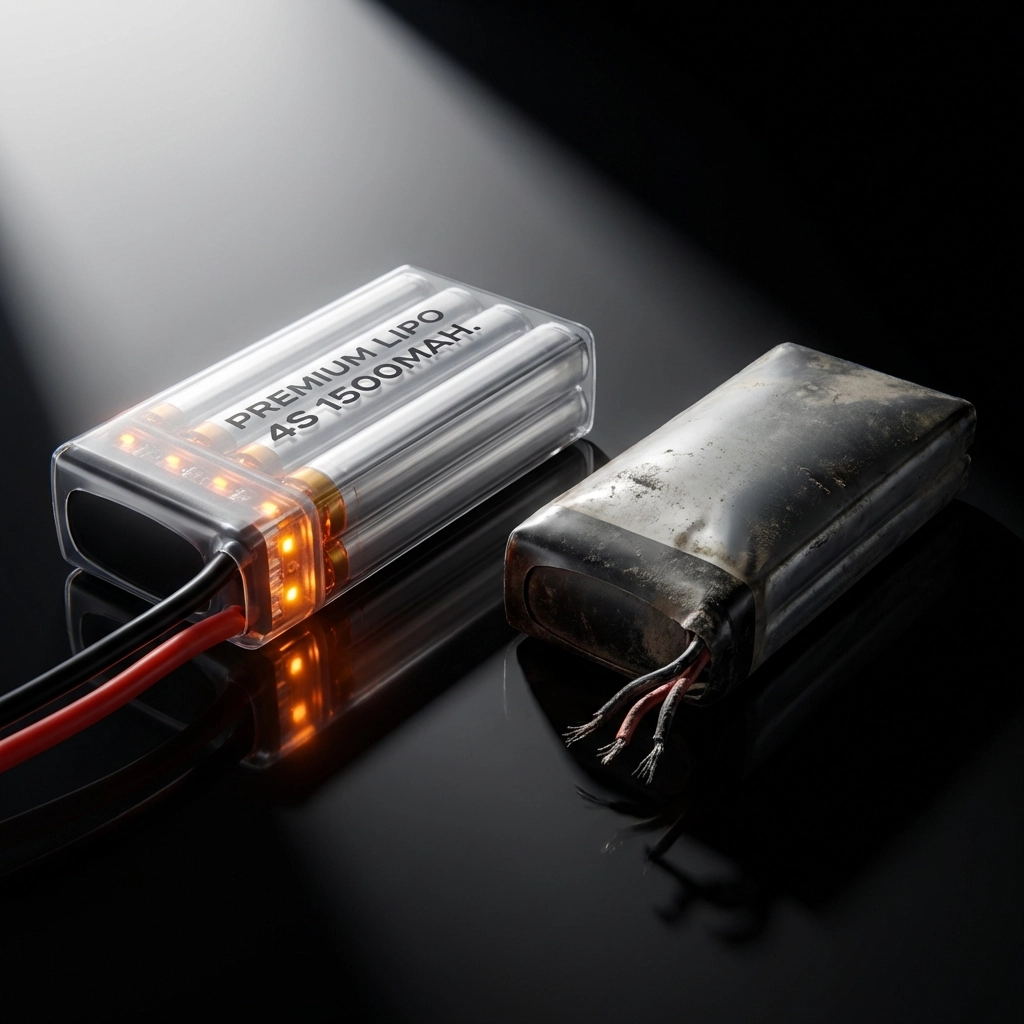
Generic LiPo Packs: The Hidden Costs

Now let’s talk about those suspiciously cheap batteries you see online. You know the ones: $15 for a 1500mAh 100C pack that seems too good to be true.

Spoiler: It usually is.

The C Rating Problem

Generic manufacturers are notorious for inflating C ratings. That “100C” battery might actually deliver 40-50C before voltage sag makes it unusable. This isn’t just annoying: it’s potentially dangerous if your quad suddenly loses power mid-maneuver.

Inconsistent Cell Quality

Quality battery manufacturers test and match cells within each pack. Generic packs? They grab whatever’s available. This leads to unbalanced cells, where one cell works harder than the others and degrades faster. Eventually, you’re charging a time bomb.

The False Economy

Let’s do some quick math. A quality battery costs $35 and lasts 300 cycles. A generic pack costs $15 and lasts 75 cycles before it’s puffed or performing poorly.

Quality battery: $35 ÷ 300 = $0.12 per flight
Generic battery: $15 ÷ 75 = $0.20 per flight

You’re actually paying MORE per flight with cheap batteries: and getting worse performance the entire time.

image_3

Flight Time: Real-World Expectations

Let’s set some realistic expectations here, because I see a lot of pilots frustrated by flight times that don’t match their dreams.

Racing/Freestyle (5-inch, 4S-6S): 3-5 minutes of aggressive flying. This is normal. Accept it.

Cinematic Freestyle: 5-7 minutes with larger capacity packs and smoother flying style.

Long-Range Cruising: 15-25+ minutes with optimized builds and Li-Ion cells.

Cinewhoops: 4-8 minutes depending on prop size and battery capacity.

The key to maximizing flight time isn’t just buying bigger batteries: it’s optimizing your entire power system. Motor efficiency, prop selection, tune quality, and flying style all factor in. If you’re looking to squeeze more time out of your setup, our performance upgrade packages address all these elements together.

Charging Speed and Safety

Quality batteries aren’t just better in the air: they’re safer on the ground too.

Premium LiPo packs can typically handle 1C-2C charging rates safely. That means a 1500mAh battery can charge at 1.5-3 amps without excessive heat buildup or degradation. Some high-end packs even support 3C+ charging for quick turnarounds.

Generic packs? Pushing them past 1C is asking for trouble. The inconsistent cell quality means some cells heat up faster than others, accelerating wear and increasing puff risk.

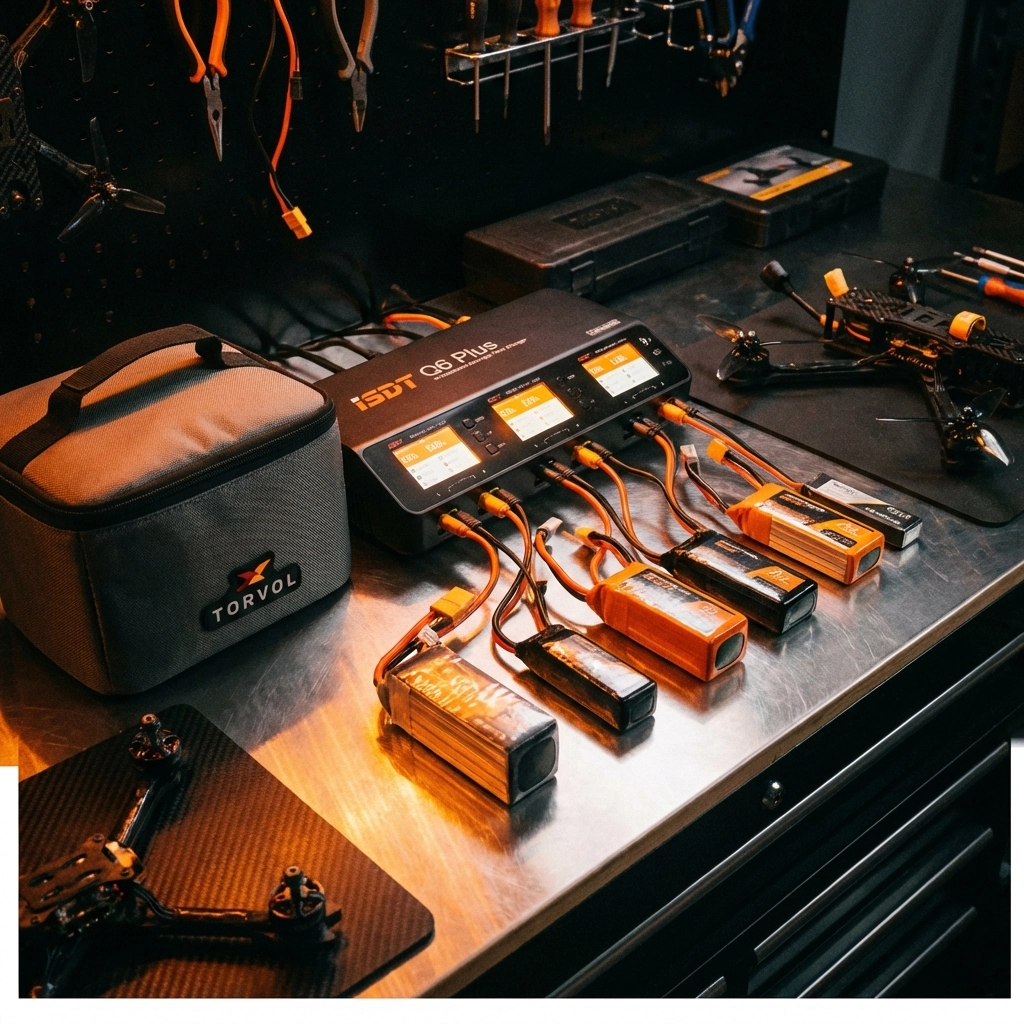
Pro tip: Invest in a quality charger with cell-level monitoring. It’ll tell you immediately if something’s wrong with your pack before it becomes a fire hazard.

image_4

Making the Right Choice for Your Flying Style

Here’s my honest recommendation based on thousands of hours helping pilots optimize their setups:

If you’re racing or doing aggressive freestyle: Buy quality mid-capacity packs (1300-1550mAh) from reputable manufacturers. The performance difference is immediately noticeable.

If you’re shooting cinematic content: Invest in higher-capacity packs (1800mAh+) with proven discharge curves. Consistency matters when you’re getting paid for footage.

If you’re building for long-range: Consider Li-Ion configurations with quality cells. The upfront cost pays dividends in flight time.

If you’re just starting out: Buy quality packs from the beginning. Building bad habits around garbage batteries will cost you more in the long run.

The Bottom Line

Your battery is the heart of your quad. It determines how long you fly, how hard you can push, and ultimately, how safe your hobby stays. Cutting corners here doesn’t save money: it costs performance, reliability, and potentially your equipment.

Need help optimizing your power system or troubleshooting battery-related issues? Check out our advanced support packages or basic maintenance services. We’re here to help you fly longer, fly better, and fly safer.

Now get out there and send it( with batteries you can actually trust.)

How to Choose FPV Motors That Won’t Burn Out: TechInMotion360’s Motor Selection Guide

There’s nothing worse than watching smoke curl up from your quad mid-flight. One second you’re ripping through a gap, the next you’re walking through a field looking for your downed drone with a fried motor. Been there. Done that. Got the singed fingerprints to prove it.

Motor burnout isn’t random bad luck: it’s almost always the result of a mismatch somewhere in your build. Wrong KV for your props. Undersized stator for your frame. Cheap windings that can’t handle the heat. The good news? Once you understand what makes motors fail, you can avoid it entirely.

Let’s break down everything you need to know about choosing FPV motors that’ll last.

Understanding Motor Sizing: Those Four Numbers Matter

Every brushless motor has a four-digit designation like 2207 or 1404. These aren’t random: they tell you exactly what you’re working with.

The first two digits represent the stator diameter in millimeters. The last two digits indicate the stator height. A 2207 motor has a 22mm diameter stator that’s 7mm tall.

Why does this matter? Stator volume directly correlates with torque and power handling. Bigger stators can push bigger props and dissipate more heat. Smaller stators are lighter but work harder on aggressive setups.

image_1

Here’s the general breakdown:

  • 1103/1106/1507 motors : Perfect for 2-3 inch micro builds
  • 1804/2004 motors : Great for 3-4 inch lightweight rigs
  • 2206/2207/2306 motors : The sweet spot for 5-inch freestyle and racing
  • 2507/2807 motors : Built for 6-7 inch long-range and cinematic rigs

Slapping 2207 motors on a 3-inch frame? You’re carrying unnecessary weight. Running 1507 motors on a 5-inch freestyle build? You’re asking for thermal failure. Match your motors to your frame size, period.

KV Ratings: The Speed vs. Efficiency Tradeoff

KV tells you how many revolutions per minute a motor spins per volt applied. A 2400KV motor on a 4S battery (14.8V nominal) theoretically spins at 35,520 RPM unloaded.

But here’s where pilots get into trouble: higher KV doesn’t automatically mean faster.

Higher KV motors spin faster but produce less torque. They’re designed for smaller props where you need RPM to generate thrust. Lower KV motors spin slower but with more grunt: perfect for swinging larger props efficiently.

The golden rules:

  • 2300-2700KV : Standard for 5-inch builds on 4S batteries
  • 1700-1950KV : Ideal for 5-inch builds on 6S batteries
  • 2800-4000KV : Designed for micro quads with 2-3 inch props

Running high-KV motors with oversized props forces the motor to work against its design. The windings overheat. The bearings wear faster. Eventually, something gives.

If you’re unsure which direction to go with your power system, the team at TechInMotion360 offers a dedicated Power System Upgrade Package that takes the guesswork out of matching motors, ESCs, and batteries.

Battery Voltage: The Foundation of Your Power System

Your battery voltage determines everything downstream. Motors are rated for specific voltage ranges, and exceeding them is a fast track to failure.

  • 4S (14.8V) : The traditional standard for 5-inch FPV
  • 6S (22.2V) : Increasingly popular for smoother throttle response and efficiency
  • 3S and below : Typically reserved for micros and cinewhoops

image_2

Here’s the thing: a 6S setup with appropriate low-KV motors often runs cooler than an equivalent 4S high-KV setup. Why? Because lower KV motors draw less current to achieve the same thrust. Less current means less heat in your windings and ESCs.

If you’re considering making the jump to 6S or want to optimize your current voltage setup, a Performance Tune & Troubleshoot session can help dial in your PIDs and motor timing for maximum efficiency.

Prop Size: The Partner Your Motor Needs

Motors and props are dance partners. The wrong pairing steps on toes.

Propeller size affects the load your motor sees. Longer props and higher pitch create more air resistance, demanding more torque. If your motor can’t deliver that torque efficiently, it compensates by drawing excessive current: and generating destructive heat.

General prop-to-motor guidelines:

Frame Size Prop Size Recommended Motors
3 inch 3″ props 1306-1507
4 inch 4″ props 1806-2004
5 inch 5″ props 2206-2306
6 inch 6″ props 2407-2507
7 inch 7″ props 2507-2807

Running aggressive bi-blade props? Your motors work less hard than with tri-blades. Pushing high-pitch props for top speed? Expect higher motor temperatures. It’s all about balance.

Flying Style: Match Your Motors to Your Mission

A freestyle pilot and a long-range cruiser have completely different motor needs: even on identical frames.

Freestyle and Racing:
You need motors that handle rapid throttle changes, recover quickly from prop wash, and survive crashes. Look for:

  • Higher torque (larger stator height)
  • Quality bearings rated for impact
  • Reinforced windings

Cinematic and Long-Range:
Efficiency trumps raw power. You want motors that sip current and stay cool during extended flights:

  • Lower KV ratings
  • Optimized for specific prop sizes
  • Excellent grams-per-watt efficiency ratings

Cinewhoops:
These ducted builds need motors that perform well in prop guards without overheating:

  • Mid-range KV
  • Designed for restricted airflow conditions
  • Often 1404 or 1507 sizes

image_3

Cheap Motors vs. Quality Motors: You Get What You Pay For

Let’s be real: budget motors are tempting. Twenty bucks for a set of four? Sounds great until you’re replacing them every few weeks.

Here’s what separates quality motors from cheap knockoffs:

Windings: Premium motors use precision-wound copper with proper insulation. Cheap motors often have sloppy windings that create hot spots and short out under stress.

Bearings: Good motors run smooth, quiet bearings rated for the RPMs and impacts of FPV flying. Budget bearings develop play quickly and create vibration that destroys flight footage.

Magnets: Higher-grade magnets (N52 vs N48) deliver better performance per gram and resist demagnetization from heat.

Quality Control: Reputable manufacturers test motors before shipping. Budget brands often skip this step, leaving you with units that vary wildly in performance.

Investing in quality motors isn’t just about performance: it’s about reliability. When you’re flying over water, through gaps, or capturing client footage, you need equipment you can trust.

For ongoing peace of mind, TechInMotion360’s Annual Remote Support Plan keeps your entire rig optimized throughout the year.

Signs Your Motors Are Struggling

Catch problems before they become failures:

  • Excessive heat after short flights : Your motors are working too hard
  • Unusual sounds : Grinding or clicking indicates bearing issues
  • Reduced throttle response : Could signal demagnetization or winding damage
  • Visible discoloration : Brown or blackened windings mean thermal damage has occurred
  • Motor oscillations : Often a sign of bearing play or imbalanced bells

Regular maintenance extends motor life significantly. A Basic Maintenance & Repair session can identify worn components before they leave you stranded in a field.

image_4

Putting It All Together

Choosing the right FPV motors comes down to matching four key variables:

  1. Frame size dictates motor size
  2. Battery voltage determines KV range
  3. Prop size must match motor capability
  4. Flying style guides your priorities

Get these right, and your motors will run cool, last long, and deliver consistent performance flight after flight.

Get them wrong, and you’ll keep chasing mysterious burnouts, wondering why your quad can’t stay in the air.

The difference between a frustrating hobby and a rewarding passion often comes down to these foundational choices. Take the time to understand your power system, invest in quality components, and don’t be afraid to ask for help when you need it.

Ready to build a rig that performs? Check out the full range of support options at TechInMotion360 and fly with confidence.

Complete FPV Kits vs Building Your Own: What Actually Saves You Time and Money

So you’ve decided to get into FPV drones. Awesome choice. But now you’re staring down two very different paths: grab a complete kit that’s ready to fly, or source every single component yourself and build from scratch.

Both options have their place. But which one actually makes sense for your situation, your budget, and your sanity? Let’s break it down with real numbers, real time estimates, and zero fluff.

The DIY Dream vs. The DIY Reality

Building your own FPV drone sounds incredible on paper. You get to handpick every component, customize everything to your exact specifications, and learn the system inside and out. There’s a certain pride that comes with flying something you assembled from bare parts.

But here’s what nobody tells you upfront: the hidden costs add up fast, and the time investment can be brutal: especially if you’re new to the hobby.

When you build from scratch, you’re not just buying parts. You’re buying the education that comes with figuring out which parts actually work together. And that education often comes in the form of expensive mistakes.

image_1

Breaking Down the Real Costs

Let’s get into the numbers. A typical DIY FPV build requires:

  • Frame: $30–$80
  • Flight controller: $40–$100
  • ESC (Electronic Speed Controller): $40–$80
  • Motors (4x): $60–$120
  • Propellers: $10–$25
  • Camera: $25–$60
  • Video transmitter: $30–$70
  • Receiver: $25–$50
  • Antennas: $15–$40
  • Wiring, hardware, zip ties: $20–$40

That’s roughly $295–$665 just for the drone itself. Now add goggles ($150–$600), a radio transmitter ($80–$300), batteries ($25–$50 each, and you’ll want at least 4), and a charger ($40–$100).

Your “budget build” just became a $700–$1,500+ investment. And we haven’t even factored in the tools you might need: soldering iron, hex drivers, multimeter, heat shrink, and more.

With a complete kit from TechInMotion360’s DJI BNF/PNP collection, you’re getting matched components that are tested to work together, often at a comparable or better price point: minus the headaches.

The Time Factor: Hours vs. Weeks

Here’s where complete kits really shine. A beginner building their first FPV drone from scratch should budget:

  • Research time: 10–20 hours (watching tutorials, reading forums, comparing parts)
  • Ordering and waiting: 1–3 weeks (especially if ordering from multiple suppliers)
  • Assembly time: 4–10 hours (assuming everything goes right)
  • Troubleshooting: 2–10+ hours (because something always goes wrong the first time)

We’re talking potentially 40+ hours before you even take your first flight. And that’s being optimistic.

Complete kits? Unbox, charge, bind, fly. Most people are in the air within an hour or two. That’s not an exaggeration: it’s the whole point of a curated kit.

image_2

The Compatibility Nightmare

This is the thing that catches most DIY builders off guard. FPV components aren’t universally compatible. You need to verify:

  • Firmware compatibility between flight controller and ESC
  • Voltage requirements across all components
  • Physical mounting dimensions
  • Protocol matching between receiver and transmitter
  • Camera and VTX voltage compatibility

Get any of these wrong, and you’re looking at components that won’t communicate, won’t fit, or worse: magic smoke when you plug in the battery. That $40 flight controller you scored on sale? Useless if it doesn’t play nice with your ESC firmware.

TechInMotion360’s complete kits eliminate this entirely. Every component is selected to work together out of the box. No guesswork, no forum deep-dives trying to figure out why your OSD isn’t showing up.

The Learning Curve Consideration

“But I want to learn how everything works!”

Fair point. Understanding your drone’s systems makes you a better pilot and gives you the ability to repair and upgrade confidently. There’s genuine value in that knowledge.

Here’s the thing though: you can still learn all of this with a complete kit. The difference is you’re learning while flying instead of learning while troubleshooting why nothing works.

When something eventually breaks (and it will: that’s FPV), you’ll have hands-on repair experience. And when you’re ready to upgrade, services like the FPV Drone Performance Upgrade Package or Power System Upgrades let you level up with confidence.

The Support Difference

Building from scratch means you’re on your own. When something doesn’t work, you’re hitting Reddit, Facebook groups, and manufacturer support (good luck with that last one). You might get helpful advice. You might get conflicting opinions. You’ll definitely spend hours searching.

Complete kits from TechInMotion360 come with something DIY builds don’t: actual support from people who know the exact configuration you’re flying.

The Annual Remote Support Plan gives you a full year of expert assistance. Got a weird issue? Someone who knows your setup can help diagnose it. Need performance tuning? The Advanced Support Package has you covered.

That’s not a luxury: it’s a massive time-saver that actually accelerates your learning.

image_3

When DIY Actually Makes Sense

Let’s be fair. There are situations where building from scratch is the right call:

  • You’re an experienced builder who already knows component compatibility inside and out
  • You have very specific requirements that no pre-built kit addresses
  • You genuinely enjoy the building process as much as flying
  • You have the tools, time, and troubleshooting patience already

For these pilots, DIY is rewarding. The process is part of the hobby for them.

But if you’re trying to fly as soon as possible, minimize frustration, and avoid expensive compatibility mistakes? Complete kits win every time.

The Real Cost of “Saving Money”

Here’s the math nobody does upfront:

That DIY build that’s “$100 cheaper” on paper? Add in the wrong ESC you bought because the listing was confusing ($45). The frame that didn’t fit your motors ($35). The camera you fried because of a voltage mismatch ($50). The two weeks of evenings spent troubleshooting instead of flying.

Suddenly your savings evaporated: and you lost time you’re never getting back.

Complete kits from TechInMotion360 aren’t just about convenience. They’re about predictable outcomes. You know what you’re getting, you know it works, and you know someone has your back if something goes sideways.

Making the Right Choice

If you’re new to FPV, the answer is pretty clear: start with a complete kit. Get flying, build your skills, and learn the systems through actual flight experience. When you’re ready to go deeper, upgrade paths and maintenance support are waiting.

If you’re experienced and want a custom build, go for it. You know the risks, you have the skills, and you’re prepared for the process.

For everyone else? Save your time, protect your budget, and start your FPV journey with components that actually work together. Your future self: the one who’s out flying instead of debugging firmware: will thank you.

image_4

Ready to Start Flying?

Check out TechInMotion360’s complete FPV drone options and find a kit that matches your goals. And if you ever need help along the way, troubleshooting support is just a click away.

The sky’s waiting. Let’s get you there the smart way.

Carbon Fiber Frames vs Cheap Alternatives: Why Your Frame Choice Makes or Breaks Your FPV Drone

Let me paint you a picture. You’ve just spent three months learning to fly FPV, dropped serious cash on a decent camera, quality motors, and a flight controller that rivals a small computer. Then you slapped all of it onto a $15 frame you found on some random marketplace because “a frame is just a frame, right?”

Wrong. So very wrong.

That budget frame is about to become the weakest link in your entire setup. And when it fails, not if, when, it’s taking everything else down with it. I’ve seen it happen dozens of times, and it never gets easier to watch someone learn this lesson the hard way.

The Hidden Cost of “Saving Money” on Frames

Here’s the thing about cheap frames that nobody tells you upfront: they’re not actually cheap. Not when you factor in replacement parts, crashed components, and the sheer frustration of dealing with subpar materials.

Budget frames typically use lower-grade carbon fiber, or worse, carbon fiber mixed with fiberglass to cut costs. The result? A frame that looks decent on paper but crumbles under real-world stress. That first hard landing? Crack. That tree branch you clipped during a proximity run? Shattered arm. That slightly rough landing on asphalt? Split bottom plate.

image_1

Quality carbon fiber frames, like the ones we work with at TechInMotion360, use properly layered, high-density carbon that’s designed to handle the abuse FPV flying dishes out. The difference isn’t just marketing speak, it’s physics.

Understanding Carbon Fiber Quality

Not all carbon fiber is created equal. This is probably the most important thing you’ll learn from this entire post, so pay attention.

Cheap carbon fiber characteristics:

  • Thin, inconsistent layering
  • Lower carbon-to-resin ratio
  • Brittle failure modes (shatters instead of flexing)
  • Rough, unfinished edges that can cut wires
  • Poor vibration dampening

Quality carbon fiber characteristics:

  • Multiple precisely-layered sheets
  • Higher carbon content for strength-to-weight optimization
  • Controlled flex before failure
  • Chamfered, smooth edges
  • Better vibration characteristics for cleaner footage and stable flight

The research backs this up: carbon fiber’s advantages include being lighter, stronger, less dense, and stiffer with more responsive handling characteristics. Quality frames resist corrosion and don’t experience the fatigue issues that plague cheaper alternatives over time.

The Crash Test Reality

Let’s talk about what actually happens when you crash, because you will crash. Everyone does. It’s part of flying FPV.

With a quality carbon fiber frame, a moderate crash typically results in:

  • Minor scratches or scuffs
  • Maybe a bent prop (easily replaced)
  • Your electronics staying safely mounted
  • Getting back in the air within minutes

With a budget frame, that same crash often means:

  • Cracked or broken arms
  • Motor mounts that snap clean off
  • Standoffs pulling through weakened material
  • A pile of expensive components scattered across the ground

image_2

I’ve personally seen pilots go through four or five cheap frames in the time a quality frame would still be flying strong. When you add up those replacement costs, plus the time spent rebuilding, plus any collateral damage to other components… that “savings” evaporates pretty quickly.

Weight vs. Durability: Finding the Sweet Spot

Here’s where it gets interesting. You’d think lighter always equals better in the FPV world, but that’s an oversimplification.

Research comparing similar-priced frames showed an aluminum frame at 216 grams versus a carbon fiber frame at 240 grams. That 24-gram difference? Barely noticeable in flight. What IS noticeable is how each material handles stress.

Quality carbon fiber frames hit the sweet spot: they’re light enough for agile flight characteristics while being strong enough to survive your learning curve. Cheap frames often sacrifice structural integrity for weight savings, giving you a drone that flies great until its first real impact.

The goal isn’t the lightest possible frame, it’s the best strength-to-weight ratio you can achieve. That’s where premium carbon fiber shines.

Flight Characteristics You Can Actually Feel

Beyond durability, your frame choice directly impacts how your drone flies. This isn’t placebo effect stuff, it’s measurable.

Vibration tuning becomes a real factor with material choice. Your flight controller is typically calibrated assuming certain vibration characteristics. Cheaper frames with inconsistent carbon quality or poor design create noise in your system that:

  • Degrades your video footage
  • Makes tuning more difficult
  • Can trigger unwanted flight controller responses
  • Reduces overall flight smoothness

A well-designed carbon fiber frame acts as a stable platform for all your components. Everything stays where it should, vibrations get dampened appropriately, and your flight controller can do its job without fighting bad data.

image_3

The Long-Term Investment Perspective

Let me break down the real math here:

Scenario A: Budget Frame Approach

  • Initial frame cost: $15-25
  • Average lifespan before replacement: 2-3 months of regular flying
  • Collateral damage from frame failures: $50-150 per incident
  • Annual frame costs: $60-100+ just in frames
  • Total first-year cost: $150-300+ including damaged components

Scenario B: Quality Frame Investment

  • Initial frame cost: $45-85
  • Average lifespan: 12+ months of regular flying
  • Collateral damage: Minimal (frame protects components)
  • Annual frame costs: $45-85
  • Total first-year cost: $45-85

The numbers don’t lie. Spending more upfront on a quality frame actually saves you money over time. Plus, you get better flight characteristics, cleaner footage, and way less frustration.

When Your Frame Does Need Attention

Even the best frames eventually need maintenance or upgrades. That’s just reality. The difference is how often and how extensive that maintenance needs to be.

If you’re running a quality setup and something does go wrong, our Basic Maintenance & Repair service can get you back in the air quickly. For more complex issues or if you want to optimize your build further, our Advanced Support Package covers performance tuning and troubleshooting.

The point is: with a quality frame, maintenance is occasional and manageable. With a cheap frame, it’s constant and expensive.

Making the Right Choice

So what should you actually look for when choosing a frame? Here’s my checklist:

Material specs: Look for 3K or higher carbon weave, multiple layers, and published thickness specifications. If a seller can’t tell you the exact carbon specs, that’s a red flag.

Design features: Quality frames have chamfered edges, proper hardware, and thoughtful component mounting options. Check for reinforced motor mounts and adequate standoff spacing.

Reputation: Frames from established manufacturers with community feedback beat anonymous marketplace options every time.

Warranty/support: Does the manufacturer stand behind their product? Quality frame makers typically do.

image_4

The Bottom Line

Your frame is literally the foundation of your entire FPV drone. Everything else, your expensive camera, your tuned motors, your flight controller, all of it depends on that frame to keep it safe, stable, and flying.

Cheaping out on your frame is like building a house on sand. Sure, it might look fine at first, but it’s only a matter of time before everything comes crashing down.

Invest in a quality carbon fiber frame from the start. Your wallet will thank you. Your components will thank you. And you’ll spend way more time flying and way less time rebuilding.

Ready to upgrade your setup or need help choosing the right components? Check out our Performance Upgrade Package or browse our full range of FPV drone support services to get flying with confidence.


Have questions about frame selection or need help with your current build? Drop by the TechInMotion360 blog for more guides and tips.

0
    0
    Your Cart
    Your cart is emptyReturn to Shop

    Search For Products

    Product has been added to your cart